MarketSharp gives an option to attach multiple files to contacts. Below, find a list of file types that are NOT allowed and descriptions of how to upload attachments, cancel uploading attachments, removing files after selecting them and modifying file descriptions.
 Locate and select the files to upload and click Open
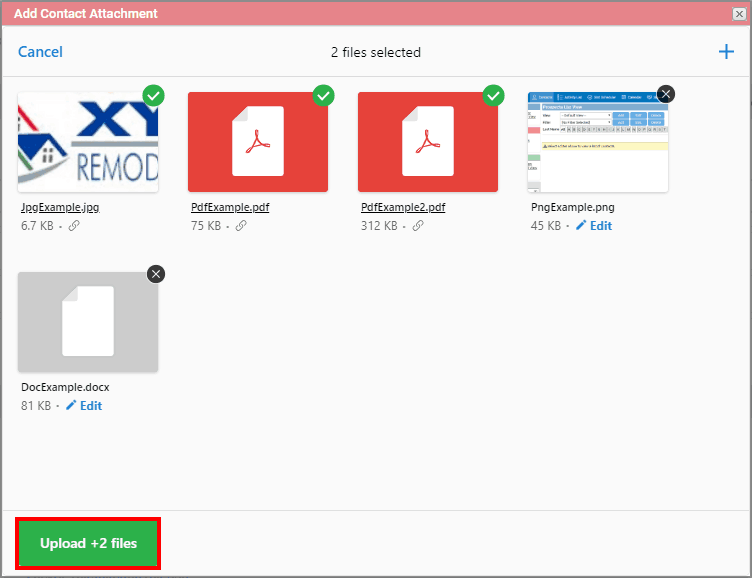
 After selecting the files, they will present themselves within the Add Contact Attachment screen. Click the green button to upload files
 The files will begin to upload and a progress bar will be shown for each file, as well as the overall upload progress below
 Once the upload has finished, the successful uploads will indicate with a green checkbox, the Add Contact Attachment page will close, and the page will refresh to show the attachments uploaded.
 Enter in the description of the file and then save the changes
 Once the files have been uploaded, the File Description will be filled out
 Canceling an upload will prevent the file from uploading. The Add Contact Attachment page will remain open. Select the x in the upper right to close the Add Contact Attachment and refresh the page. The attachments that were uploaded will then be present.
 Browse or drag and drop files to add more
 Select the green upload button to upload the remaining files
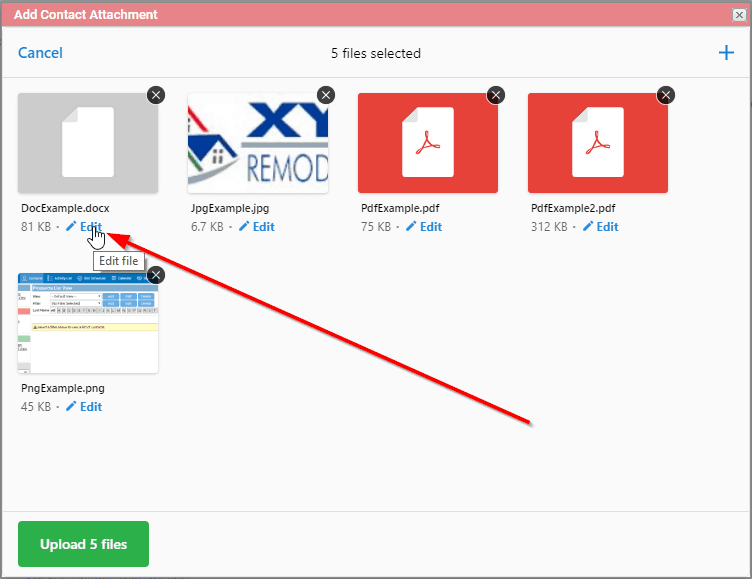
 After uploading the files, the user can click on the blue pencil to edit, select the blue link of the file name to view/download it, or delete the attachment.

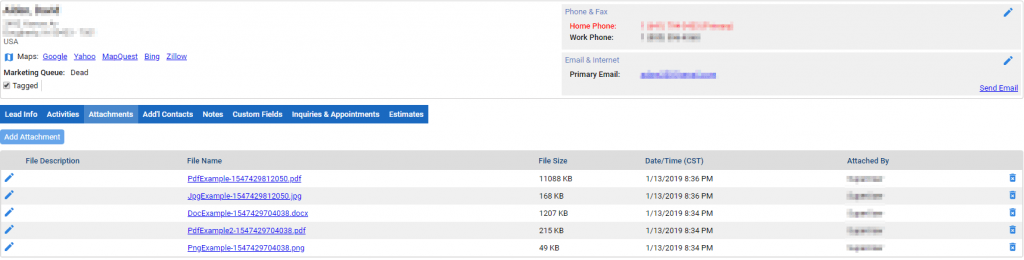
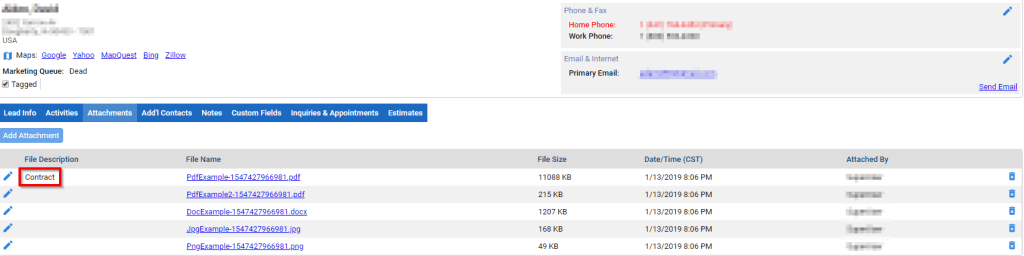
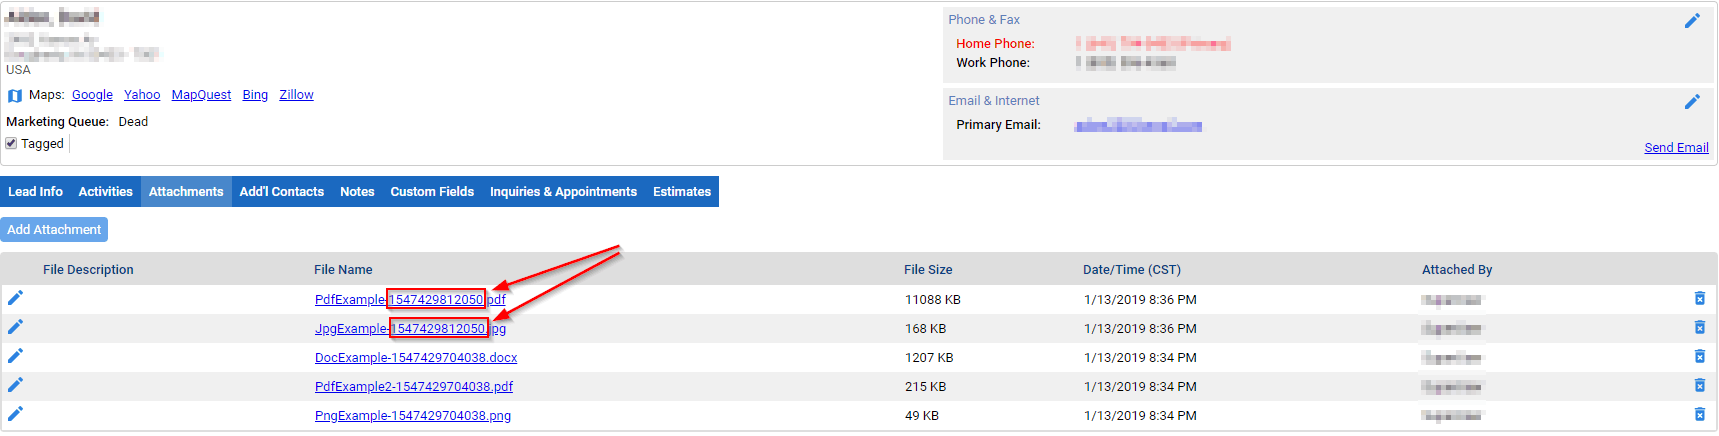 When uploading attachments, the files that were uploaded used to add a time stamp at the end of the file name. We have removed this function to maintain consistency of the file name when uploading. Any new files that are uploaded will no longer have the added timestamp (numbers) to the file name.
File types that are not allowed:
asp,aspx,bat,bin,c,cc,cmd,com,cpl,crt,cs,dll,exe,h,hh,hpp,inf,java,js,jse,lnk,msi,pif,ps,reg,scr,sh,sql,sys,vb,vbe,vbs,wsc,wsf,wsh The file uploader is limited to 50 files per upload. Each file needs to be 25 MB or smaller. This default was chosen because 50 files at 25 MB will be ~1 GB of data.Uploading Attachments
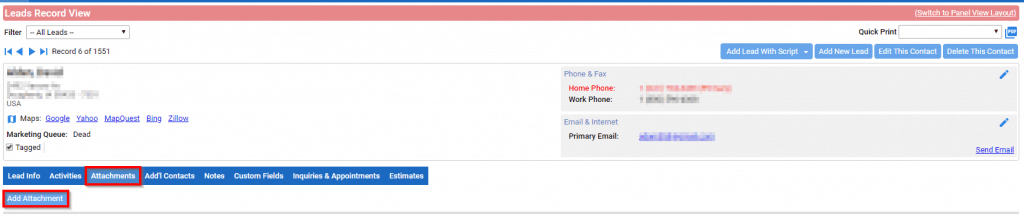
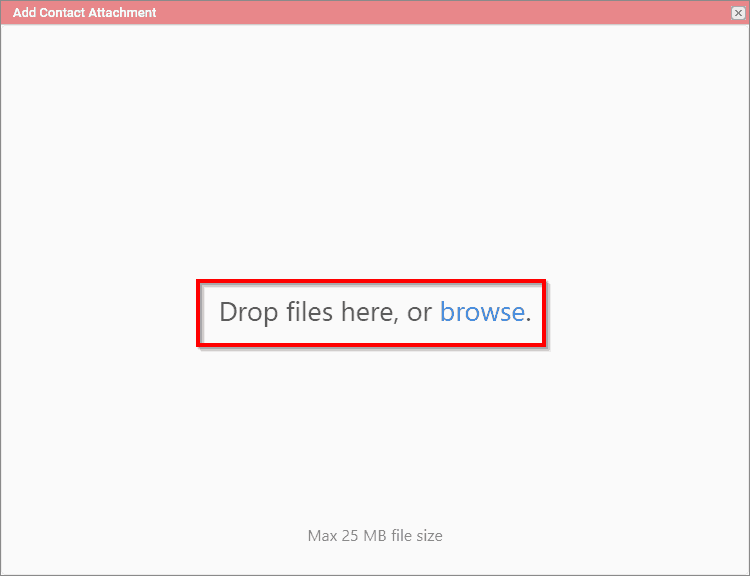
There are two ways a user can upload attachments. The first option is browsing for the attachments, and the second is using the drag and drop feature. To attach files to a contact, start by pulling up the contact record. Once the contact record is up, click on the Attachment Tab and the Add Attachment button
Browsing for attachments
After selecting Add Attachment, click the blue browse link to browse the computer for files
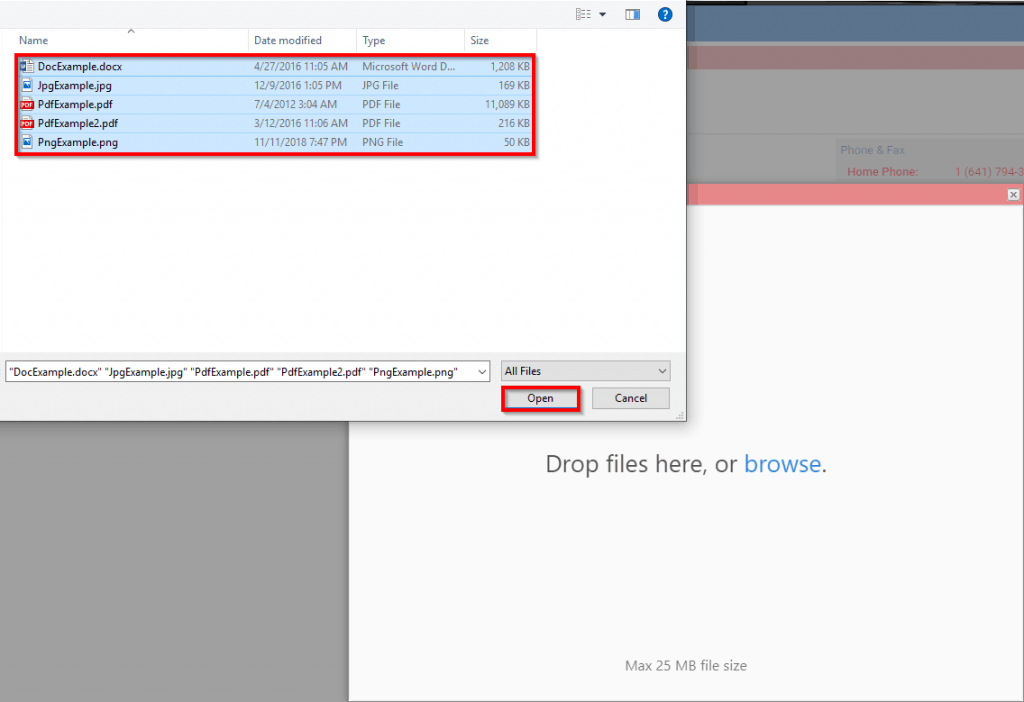
Locate and select the files to upload and click Open
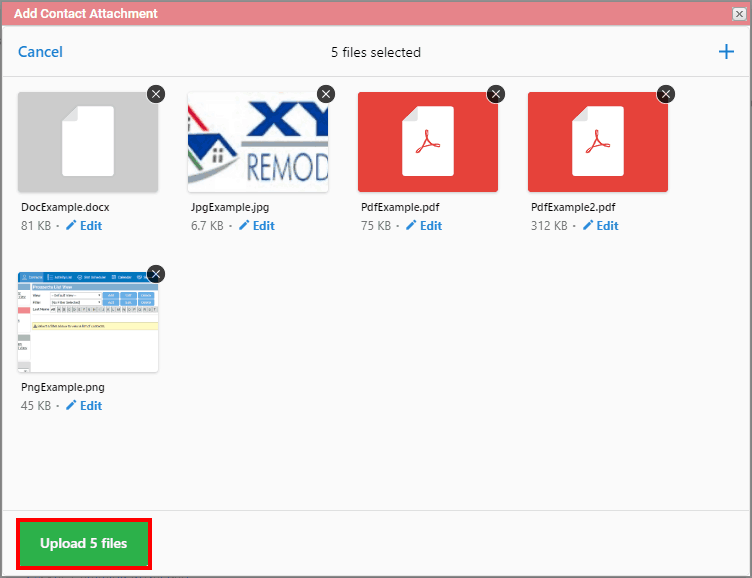
After selecting the files, they will present themselves within the Add Contact Attachment screen. Click the green button to upload files
The files will begin to upload and a progress bar will be shown for each file, as well as the overall upload progress below
Once the upload has finished, the successful uploads will indicate with a green checkbox, the Add Contact Attachment page will close, and the page will refresh to show the attachments uploaded.
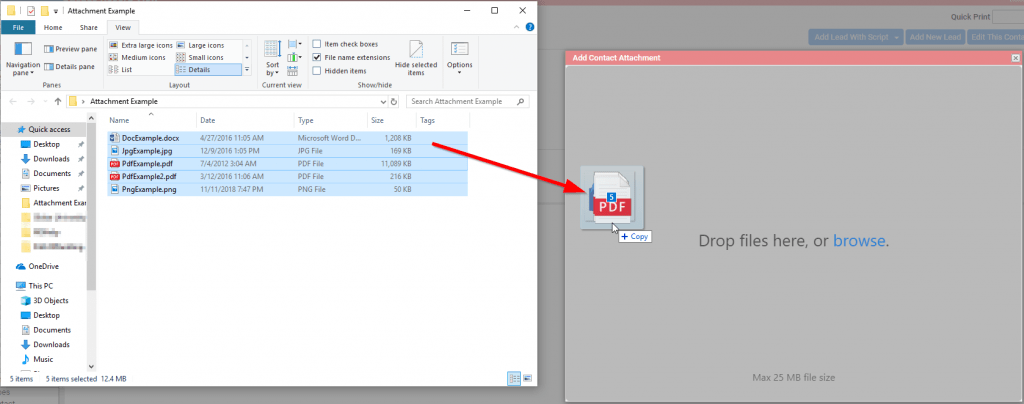
Drag and Drop Attachments
After opening up the Add Contact Attachment screen, the user can open up their file explorer to look for the file they wish to upload. Highlight the files, hold down the left mouse button and then drag them to the Add Contact Attachment screen. Lift up off of the left mouse button to drop the files. Select the green upload files button to complete the upload.
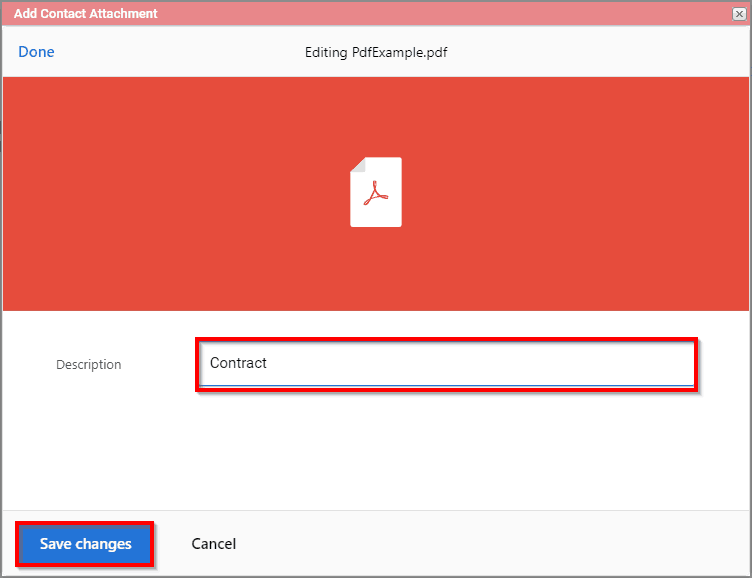
Changing the Description of the file
After the files have been selected and placed into the Add Contact Attachment screen, the user has the option to edit the description of each file.
Enter in the description of the file and then save the changes
Once the files have been uploaded, the File Description will be filled out
Canceling an attachment during upload
During the upload process, the user has an option to cancel an upload for a file
Canceling an upload will prevent the file from uploading. The Add Contact Attachment page will remain open. Select the x in the upper right to close the Add Contact Attachment and refresh the page. The attachments that were uploaded will then be present.
Removing an attachment prior to upload
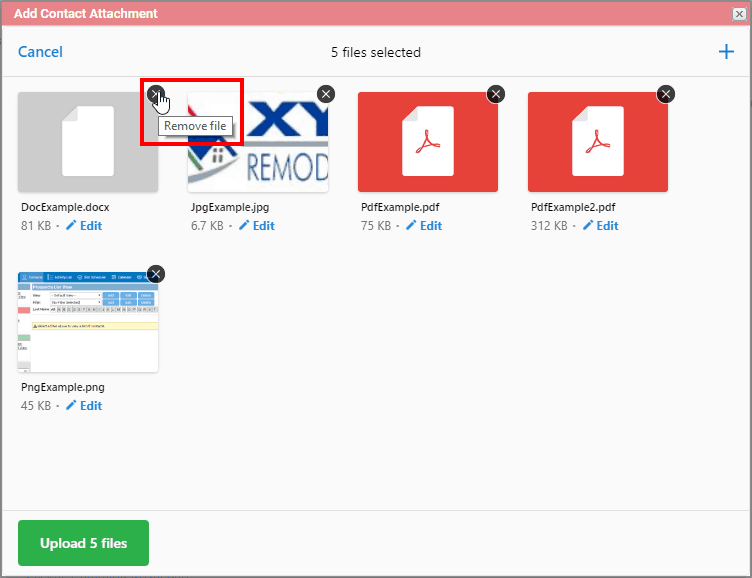
The user has the ability to remove any unwanted attachments added to the Add Contact Attachment page prior to the upload. Selecting the X in the upper right hand corner of the attachment will prevent the attachment from being uploaded.
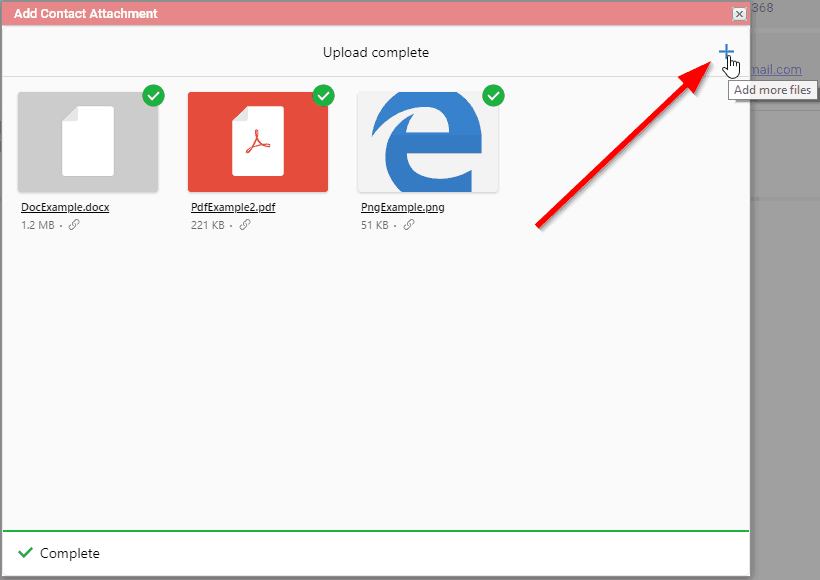
Adding more files to upload
The user can upload more attachments by selecting the blue + icon in the upper right
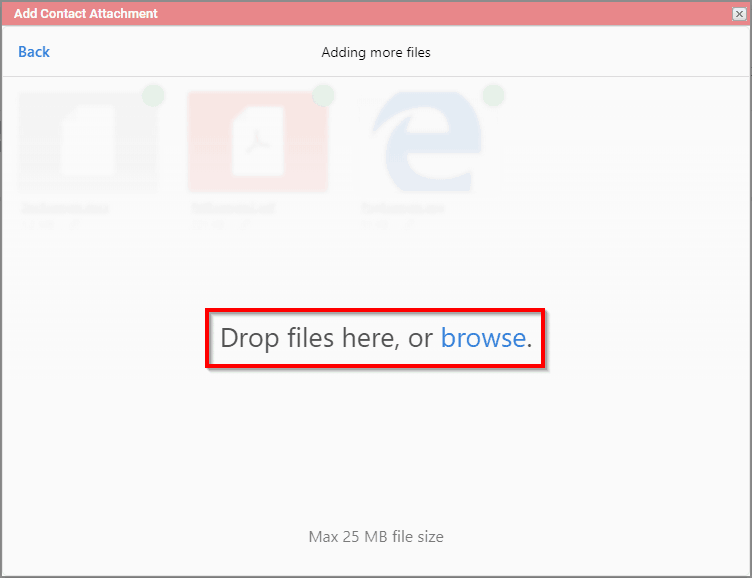
Browse or drag and drop files to add more
Select the green upload button to upload the remaining files
After uploading the files, the user can click on the blue pencil to edit, select the blue link of the file name to view/download it, or delete the attachment.
Were there numbers added to your file name?
When uploading attachments, the files that were uploaded used to add a time stamp at the end of the file name. We have removed this function to maintain consistency of the file name when uploading. Any new files that are uploaded will no longer have the added timestamp (numbers) to the file name.