Editing a Letter File
Below is some information on adding a merge field to a letter file. Once we have the data is in MarketSharp, we will edit the letter file to make sure it is pulling from the correct field or insert the field we want the letter to pull from (ie- modifying the merge field).
- Click Print Assistant on the left for the section that contains the letter you are editing
- Choose Print File Maintenance
- Choose Letter Files
- Click Edit to the left of the letter file you are trying to print
Once the file opens, locate where you think your information should be populating or where you want it to populate and look at the merge field. If there is no merge field, place your curser where the merge field will go. A merge field is usually a string of text that is surrounded by <><> or « ». You can change or insert a merge field by:
- Highlighting the merge field in question
- Pressing the delete key to remove it (you will only need to do this if a merge field is present that you wish to change)
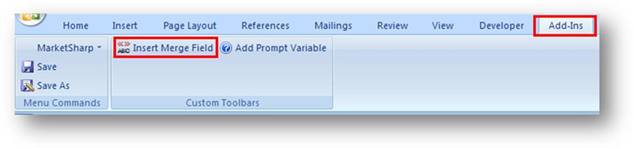
- Click on the “Add-Ins” Tab at the top of Microsoft Word
Note: If you have Word 2003, instead of an Add-Ins Tab, there will be a MarketSharp Dropdown instead
- Clicking “Insert Merge Field”
- Scroll to find the merge field you are looking for (ie—“Appointment.Salesperson_1”)

- Double Click on the field or choose ‘Insert’ to put the field into your letter
Save the file and either give it a new name or overwrite the existing file name </></>