Custom Fields Report
If you have ever wondered how to make a report show Custom Fields then this is the tutorial for you. Custom fields are different types of information that you have put into the system that originally did not belong in MarketSharp. They can be created using a variety of methods such as check boxes, dates, drop down list, text boxes and etc.

The only problem with Custom Fields is because the data is not generated from MarketSharp but the user is just putting in this information, MarketSharp, currently, does not have the ability to display these results on the reporting tab.
However, with a work around, this guide will help you to be able to generate your own Excel Spreadsheet of this data and you will use that as your report or use it to create a more detailed report, the latter can be achieved if you are really handy in Excel.
Before we get started, if you have never created a custom field, lets make one.
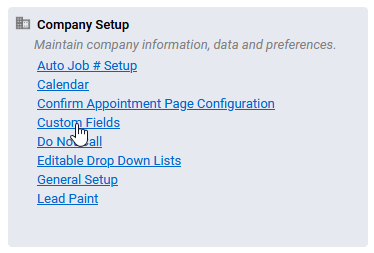
Navigate to the Admin Page. Locate for the group of Company Setup and click on the link for Custom Fields.
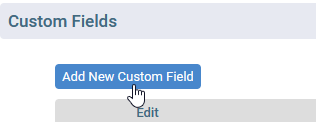
If there is nothing here then you will just see a button that says Add New Custom Field, let's click on that to create a new entry.
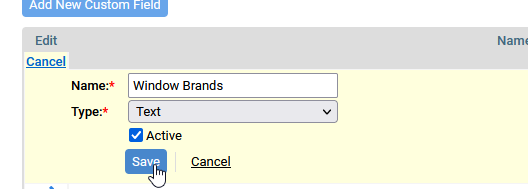
Name the custom field Window Brands and choose text for the Type. Make sure the Active checkbox is active and click save.
Now that we have created a Custom Field, let's plug in some data and then create a Filter in order to obtain some data to build a report on.
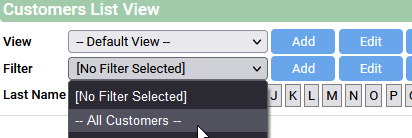
Navigate to the Contacts tab and click on Customer List View.

Under the Customer List View head over to the Filter and choose "All Customers"
Since we don't any customers that use our Custom Field, I want to choose a few for this tutorial and this is a great way to quickly pull names.
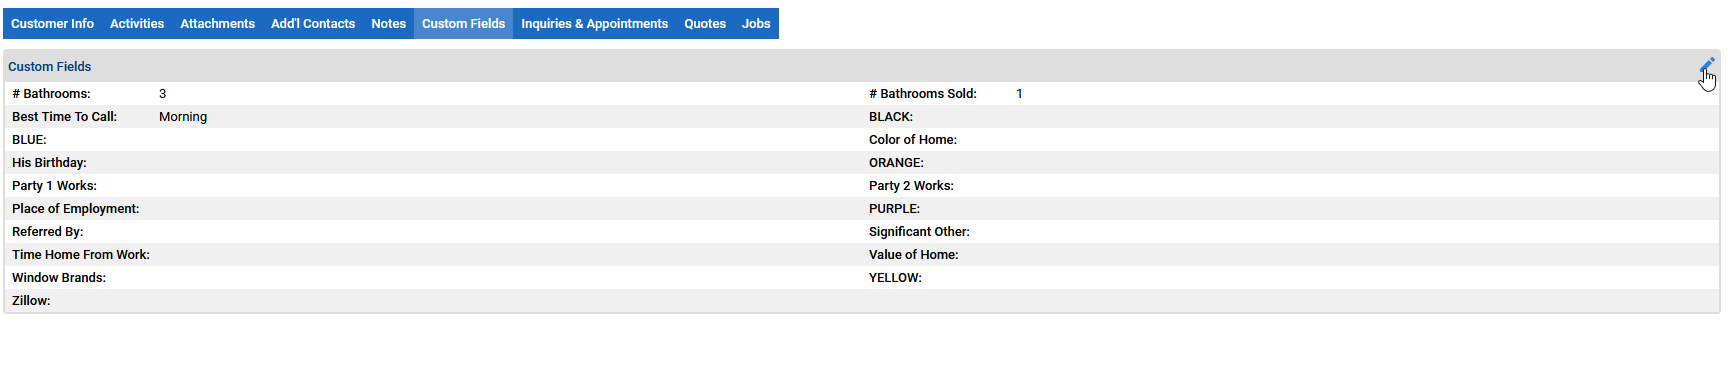
Click on a customer's name to access the customer record. Then you will see a tab on the record labeled Custom Fields. Click on Custom Fields.

Click the Blue Pencil Mark to Edit the Entries for Custom Fields.
In the Text Box for Window Brands type in Window Test.
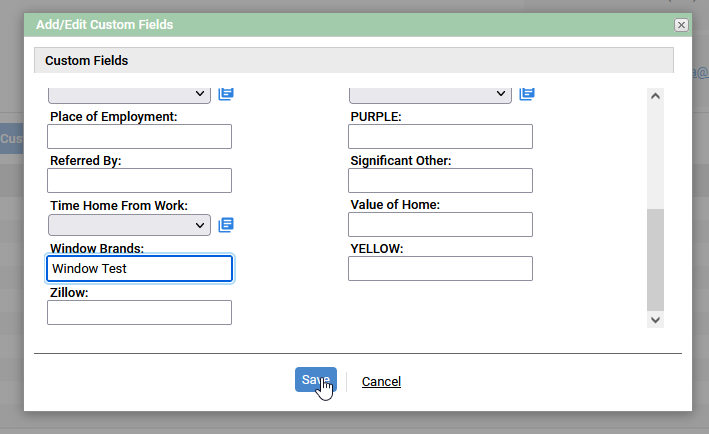
Make sure to hit save. Repeat this step on a few more contacts and then go back to the Customer List View.
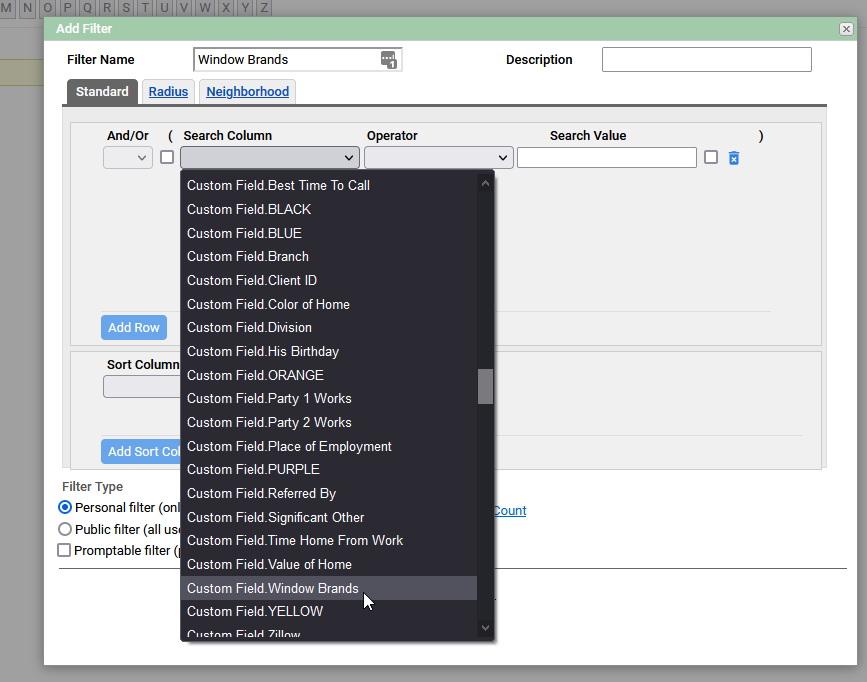
On the Customer List View screen, we will now create a Filter. Click the Add button next to the Filter drop down.

Name the Filter Window Brands. For the search column choose Custom Field. Window Brands. For the operator choose Equals and then for the search value type in Window Test.
Make sure to test the Filter by clicking the GET COUNT link at the bottom, it should display the number of customer whom has this Custom Field on their record.
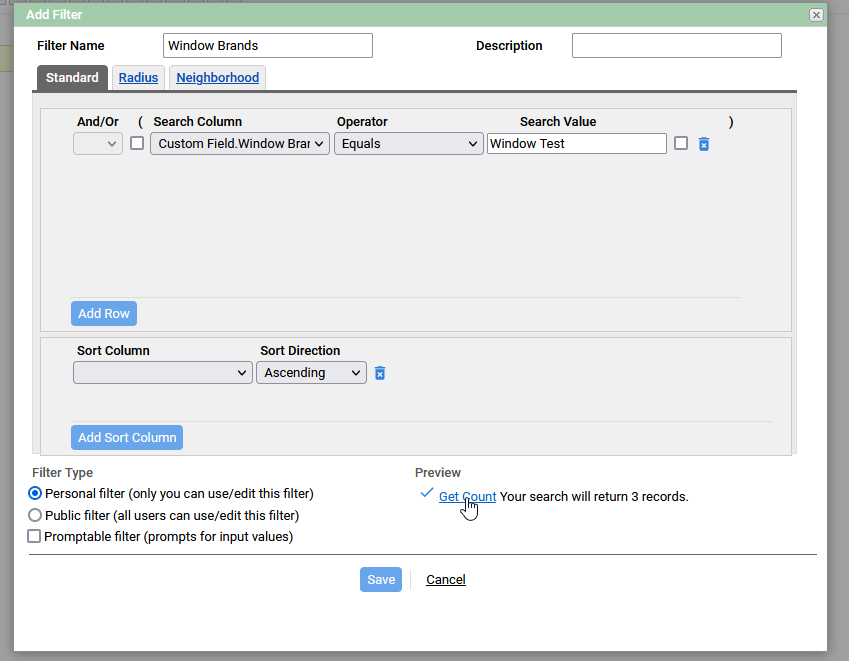
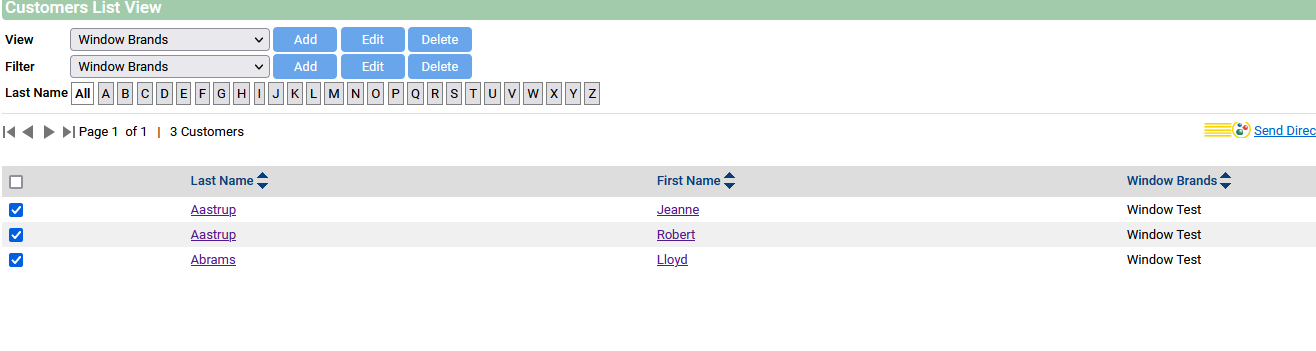
Make to also make this Filter Public if you wish others to see it and hit save when you finished. Now our Filter will display the results on the Customer List View page. Taking this one step further before we export, I want to be able to see which window brand these customers have. In order to do this we will need to change our options for the View.

Click Add on the View.

Name this View - Window Brands and locate the merge field in the Available Fields on the left. Once you locate it hit the arrow that points towards the box on the right to add it to the Selected Fields to Display. Anything in this box will be what is displayed on our Filter. Make sure to check the box at the bottom that says - Allow anyone to see and edit this view and save.
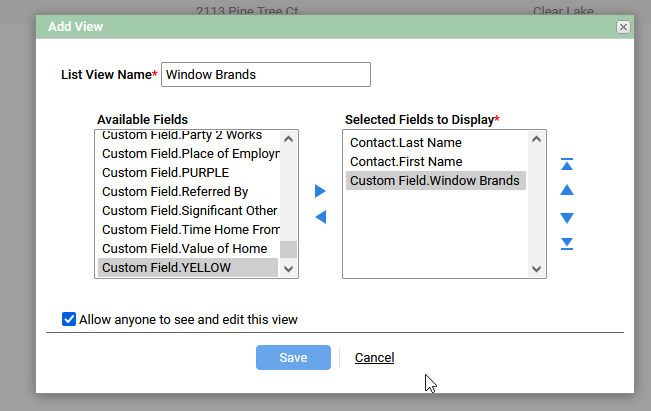
Now the View may change compared to the Default View. If you wish to add more information for your View such as email, address, phone number, and etc, you can add these by clicking EDIT next to the View and make any changes you wish for your View to have and hit save.
We now have created our View and Filter. The last step is to export this information to an Excel Spreadsheet to build our report.
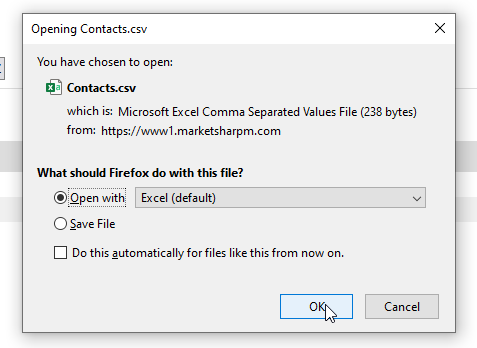
To export this to Excel if you look to the right side of the Customer List View page you will see an Export button with an Excel Logo. Click on Export.

You will have a pop-up display asking you to open the document. Excel should be the default here. Click OK and Excel should launch.
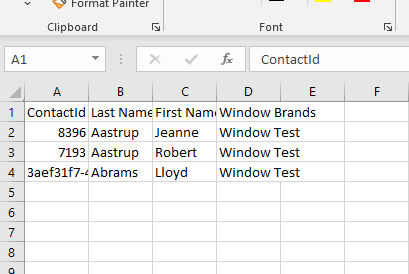
You can then use your Excel skills to create a spreadsheet report how you like with the information pulled from MarketSharp. There you have it, this is the work around for getting Custom Fields to be displayed on a report.
Some Key Notes on this are as followed:
- Custom Field information will not show on the Reporting Tab
- You must have Excel in order for this to work as intended
- Try not to use Special Characters like ( * %$# as this may mess up saving data in MarketSharp.