Issuing Appointments for the Slot Scheduler
In this Tutorial, I will show you how to issue appointments booked with the slot scheduler to salespeople using the Sales Tab in MarketSharp.
If you are looking to use our slot scheduler feature but also want an easy way to collect all the appointments that are booked and disperse them among your sales team, then continue down below ↓.
Step One: Creating a Fake Employee
This may sound strange, but stay with us, as this is the key to making this all work.
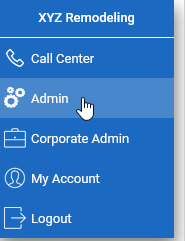
Navigate to the Admin Page.
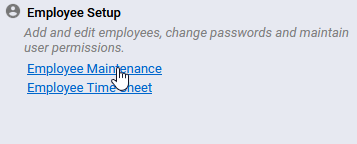
- Look for the header Employee Setup and click the link for Employee Maintenance.
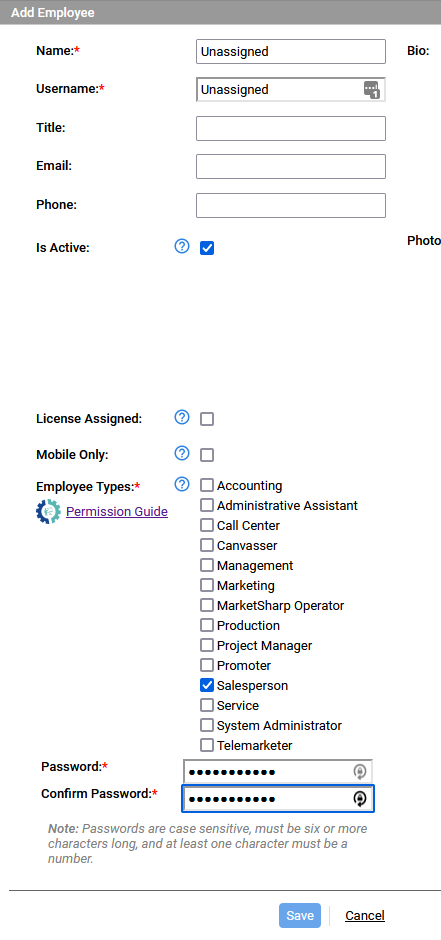
- Click the button for Add New Employee. (note: you will NOT have to assign a license to this employee)

- You will make the name and username Unassigned. Check Salesperson for Employee Type and choose a password for this employee. Note: Passwords are case sensitive, must be six or more characters long, and at least one character must be a number.
______________________________________________________________________________
Step Two: Scheduling Appointments in Slot Scheduler
Note: If you have not done so please look at the article for Slot Scheduler Tab
It will show you how to setup the Slot Scheduler.
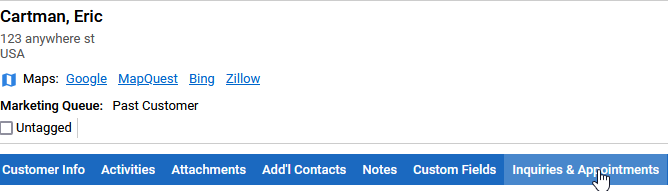
- Go to a contact's record and choose "Inquiries & Appointments"
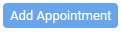
- Next Click Add Appointment.
- This will open a new box to Add/Edit Lead Appointment.
- Under the Appt Date/Time Section choose the right most icon to "Schedule via Slot Scheduler"

Note: You may have to choose a Type to get the time slots to show. Be sure to review the article above to learn more on how to edit time slots if you have not done so, otherwise you will not be able to continue with the tutorial.
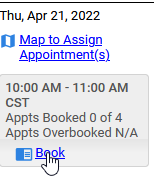
Choose the appointment that works with the contact and choose Book.
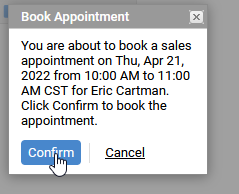
It will pop up with a confirmation, be sure to recheck the date and time and click confirm
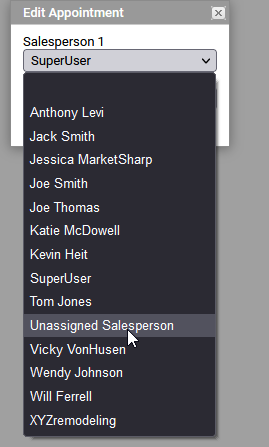
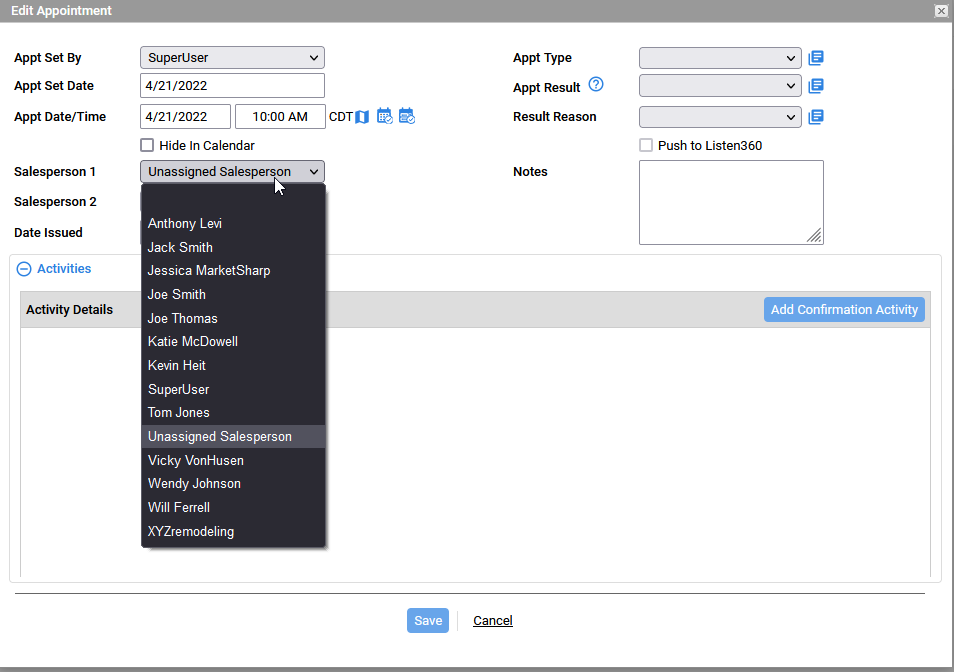
Next you should see the appointment on the right and you can choose Reassign and assign this appointment to the Unassigned Salesperson. ( You could also choose the Unassigned Salesperson when you initially set the appointment as well).

________________________________________________________________________________________
Step Three: Calendar Tab
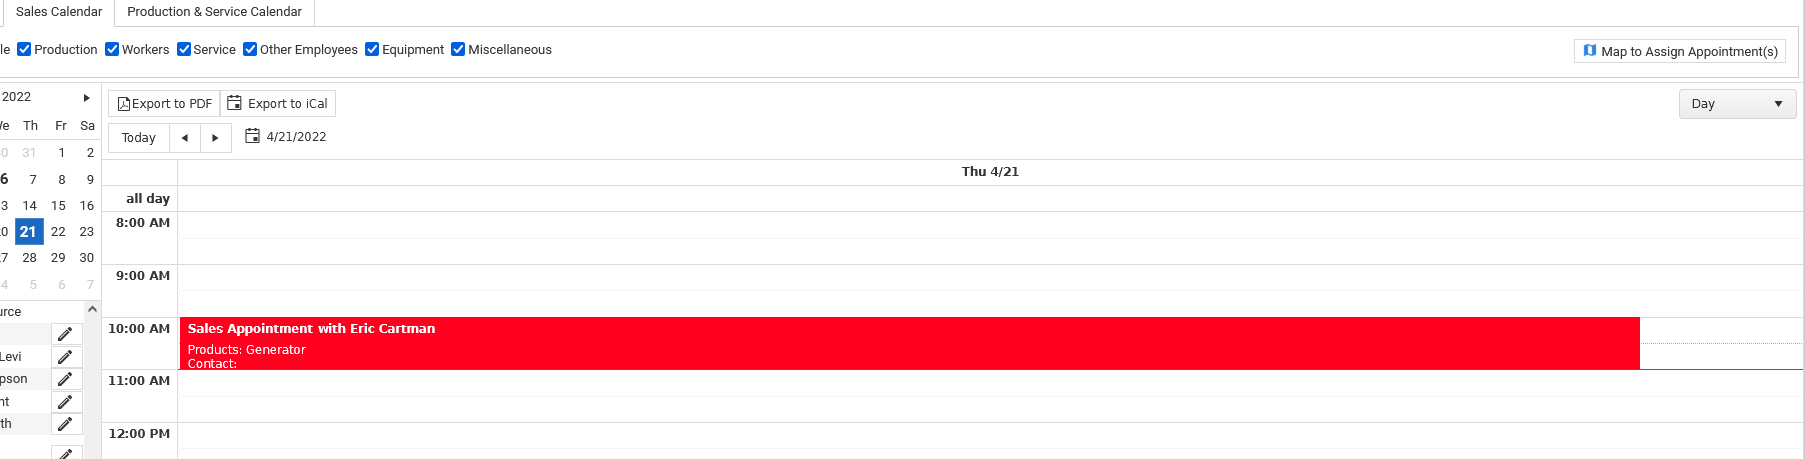
All these appointments that are booked will show in the calendar tab under the Unassigned Salesperson name.
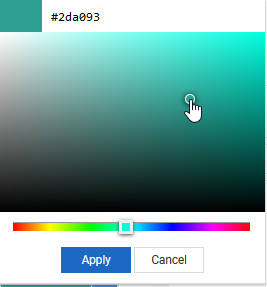
I recommend you give the Unassigned Salesperson a calendar color that is not like other's so it can help you recognize that you have a free appointment that needs to be assigned a salesperson. To change the Color click the pencil next to the name of the employee on the left side of the calendar. Click the down arrow to open the color wheel and then choose the color and click apply.


This is just a good way to spot check appointments throughout to day and give a good visual that you have an open appointment that needs to go to one of your salespeople.
__________________________________________________________________________________________________________________________________
Step Four: Sales Tab
This is the last hurdle of the tutorial. Navigate to the Sales Tab - 
You can choose the following settings to see all the scheduled appointments that you made in the Slot Scheduler

Then all you have to do is edit any of the shown appointments and choose the salesperson you wish to have this appointment.

Then you can also tag the appointment and email this to the salesperson using the Email & Issue Tagged Appointments feature in the sales tab.
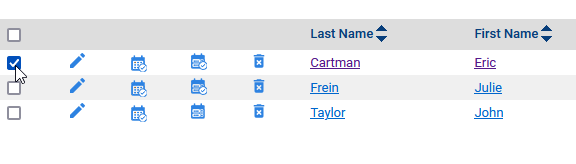
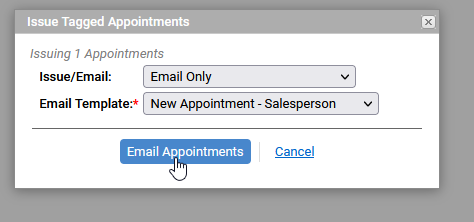
To do this, make sure the now correct salesperson is chosen on the drop down, to the left of the appointment is a check box, select it then choose Email & Issue Tagged Appointments on the upper right of the screen.

Here it will open a box where you can choose options on how to send it. Choose Whatever you'd like

The salesperson should receive an email and the calendar will reflect that they have the appointment now. That concludes this Tutorial on how to efficiently setup and route appointments from the Slot Scheduler to your sales team using a few tricks within MarketSharp.